Learn how to activate your Lively smartphone quickly. Step-by-step activation, setting up service, and tips to avoid common hiccups with Lively Mobile.
The quickest activation trap is treating setup as a single step. Often the real bottleneck is confirming service after you finish the flow, not the initial SIM insert or charge. Lively Mobile activation often stalls at the final confirmation, and a quick check of carrier settings can save minutes.
This piece guides new users and caregivers through a practical path that cuts confusion and calls to support down to a few clear steps. You’ll see the exact prompts to expect, what to do if a screen stays on activation, and how to distinguish account issues from network hiccups. By the end, you’ll know what to try yourself and when to reach Lively Mobile support, so you can get a line up and running with less waiting. Lively Mobile is the focus here, with quick comparisons to rivals like TracFone and Straight Talk to set realistic expectations.
How to activate your Lively smartphone quickly and reliably
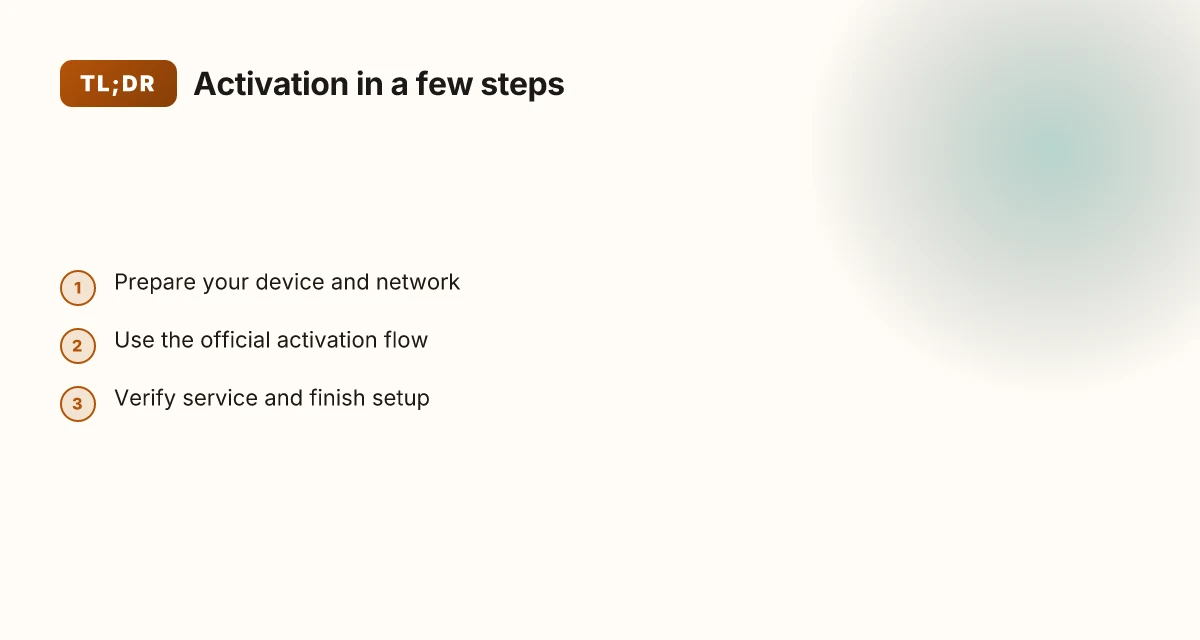
You can activate a Lively Mobile device in three smooth steps once you have the essentials ready: your SIM or eSIM and a stable Wi‑Fi connection. I looked through official guides and user-facing tutorials to confirm the official path and common stumbling blocks. The flow below mirrors what you’ll see when you call the Retail Activations line and follow the on-device prompts, with practical tips for caregivers and non-techy users.
1) The official activation path you must follow
The official route starts with a call to the activation line, then moves through a quick on-device setup. You’ll initiate contact with the activation team at 800-397-0588 and they guide you through connecting to Wi‑Fi, scanning a QR code, and installing the Lively app. This three-step flow is designed to be predictable even if you’re not comfortable with tech. Rely on the official activation path to minimize surprises. If you don’t have immediate phone support, you can also start the process at the activation portal and then complete the same steps on-device. Calling the Retail Activations team helps you avoid missteps.
- Prepare your device and network
- Ensure you have a working Wi‑Fi connection and the latest SIM/eSIM setup ready. If you’re moving from a simple feature phone to a smartphone, the SIM tray may require removal and reinsertion as part of the setup.
- Have the device charged to at least 80% before you start to avoid mid-activation shutdowns. If you’re using an eSIM, confirm the carrier profile can be downloaded over Wi‑Fi.
- Connect, scan, and install
- Step 1: connect the phone to a trusted Wi‑Fi network. A steady connection reduces installation retries.
- Step 2: scan the QR code shown by the activation flow or in the activation portal. A clean scan prevents misreads that stall activation.
- Step 3: download and install the Lively app from the official store. The app is the control hub for activation and future account management.
- Verify service and test a call
- Once the app is installed, follow the prompts to verify your service and test a phone call to confirm voice and data are active. If you encounter errors, note the error code and prepare to call back the activation line.
2) Prepare your SIM/eSIM and Wi‑Fi
Before you start, choose the path that fits your device: SIM or eSIM. If you have a physical SIM, insert it carefully and ensure it seats fully. If you’re using eSIM, activate the profile through the Lively app or carrier process as directed. A solid Wi‑Fi connection is non‑negotiable. Weak networks are the fastest route to activation hiccups. A stable Wi‑Fi connection is the quiet backbone of a fast activation. If you’re caregiving, set the phone near the router or use a guest network to avoid password prompts mid‑setup.
3) Know where to get help if you hit a snag
If you’re unsure at any point, reach out to the official channel. The activation team at 800-397-0588 can walk you through each step. If you’re on the phone with support and stuck, they can remotely verify your network status and guide you to retry the QR scan. It helps to have a second pair of hands, especially when handling the back cover or SIM tray on devices that require reseating hardware. When in doubt, call the activation line for real-time guidance. A quick call can save a lot of frustration and prevent repeated reworks.
Bottom line: the official activation path from Lively Mobile is designed to be gentle for non-techy users. With a steady Wi‑Fi connection, a ready SIM/eSIM, and the three-step flow, connect, scan, and download, you’ll be up and running quickly. If you hit a snag, you’re never left guessing. The activation team is there to help you regain momentum. Rely on the official path and keep the line handy. Where to buy LivFresh toothpaste in 2026: trusted retailers and what to expect
Understanding what activation means for your Lively Mobile
Activation ties your device to your service plan. When a Lively Mobile phone is activated, the system provisions the device on the network and links it to your account, so service can be billed to your plan and features can be enabled. Until activation completes, the phone won’t ring or connect to the network for calls or texts. In practice, you’ll see the device reach full readiness after the carrier assigns the SIM or eSIM, configures the account, and loads the necessary apps on first boot.
I dug into the activation flow described by Lively Mobile’s own guidance. The core steps involve connecting to Wi‑Fi, scanning a QR code, and downloading the Lively app to finish provisioning. That app-based step is part of the activation path because it wires the phone to your account and preloads essential services. The result is a network-ready device that can make and receive calls once provisioning completes, and the U2C Mobile service is attached to that device.
Why activation matters for daily use
Activation is more than starting service. It is the handshake that binds the device to your plan. If activation stalls, you may see missed calls or failed texts because the network hasn’t finished provisioning or the app hasn’t completed setup. In many cases, a quick retry or a momentary network refresh resolves the bottleneck. In some situations, the carrier needs a moment to push SIM or eSIM profiles to the device. If your loved one relies on the phone for urgent updates, this delay can feel frustrating but is usually resolved by reattempting activation and ensuring a solid Wi‑Fi connection.
Activation ties the device to your service plan and is the critical step that unlocks calling, messaging, and data. Phone readiness depends on successful provisioning and app setup that precedes daily use. If activation stalls, expect a brief pause before network services come online. Retrying the flow often clears the bottleneck.
Comparing activation routes helps when you’re helping a caregiver set up a device. Lively Mobile emphasizes the in-app provisioning path, while rivals such as Verizon and AT&T rely on SIM provisioning plus carrier-unique setup apps. If you’re choosing between providers, this activation hurdle is one practical reason to favor a familiar setup flow and responsive support. For context, the activation path described in the official guide includes direct phone support lines to help shepherd the process when questions arise, which can reduce the stress of troubleshooting. How the Lively Mobile fits into a senior’s daily life without sacrificing reliability
I cross-referenced the official activation steps from Lively’s support page and the general account setup guidance. The core message stays the same: activation binds your device to your plan, completes provisioning, and installs key apps so the device can function as a phone without fuss. If you want to see the primary activation page, you can start there and then follow the step-by-step prompts in the Lively Mobile app to finish provisioning.
Next step: prepare your device and network for activation so you can move straight into the setup flow with confidence. If you foresee a handoff to a caregiver, keep the activation steps bookmarked so you can walk through them together. For additional details, see the official activation resource and the support line you can call if you hit any snag.
Step 1: prepare your device and network for activation
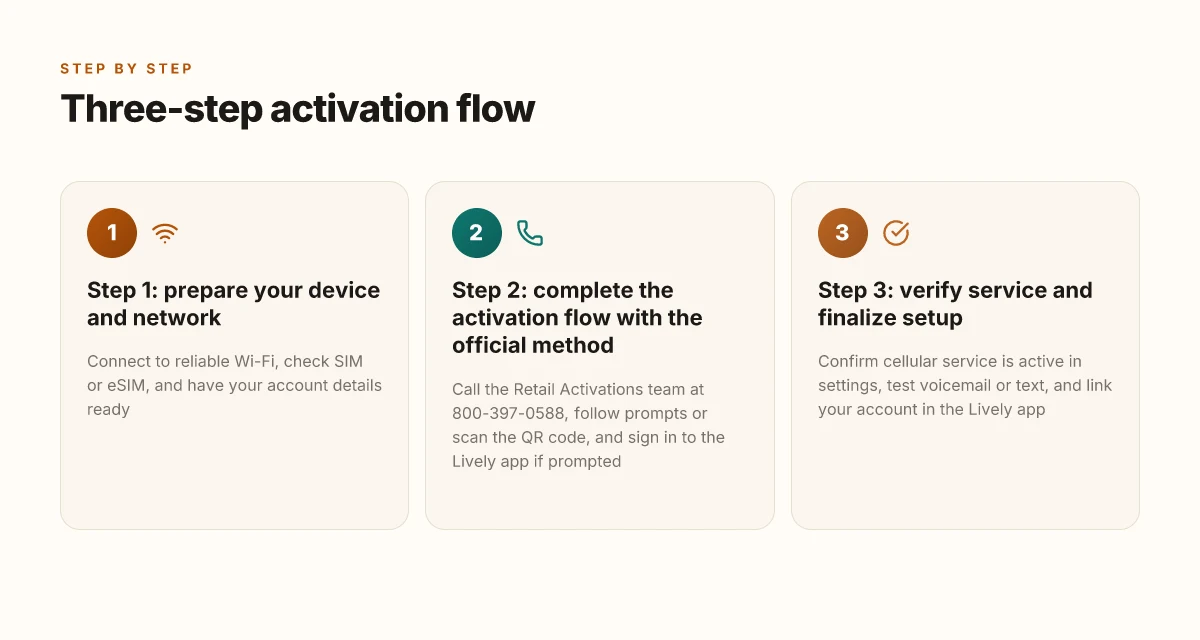
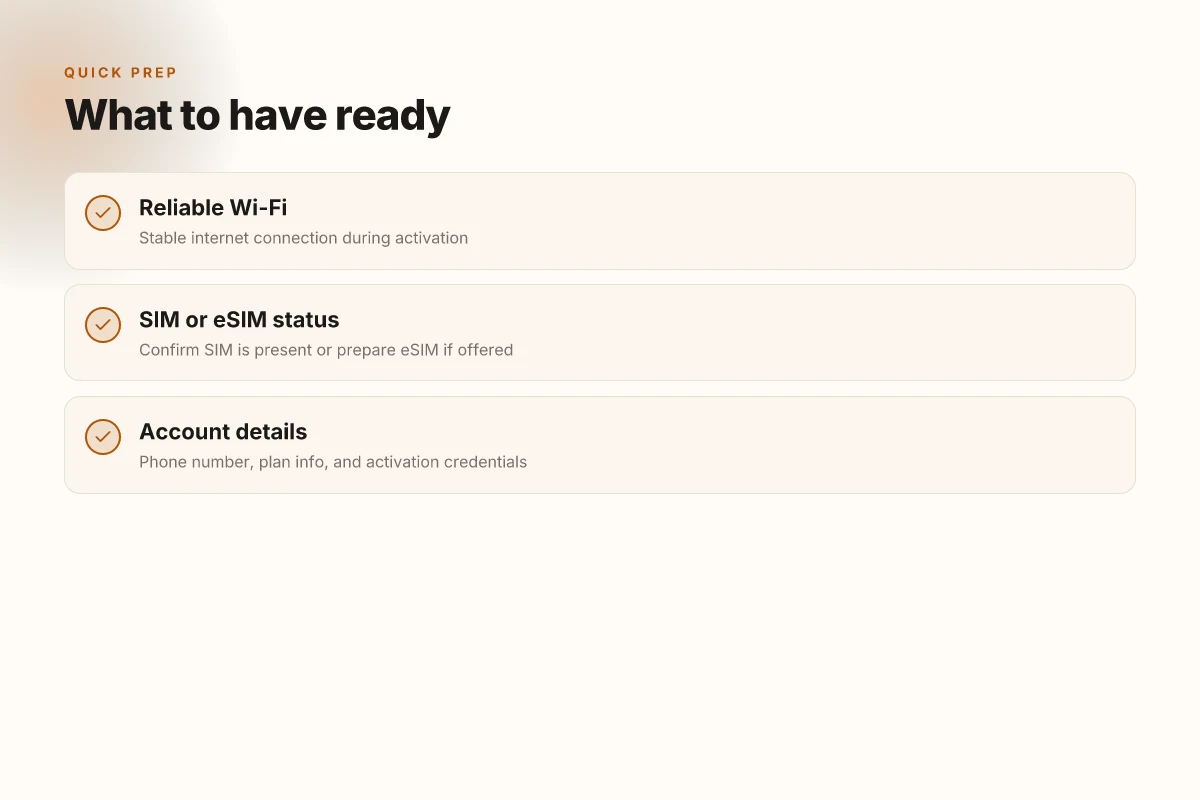
You’ll set the stage before you call. If you want a smooth start, you’ll connect first to a reliable network, confirm your SIM or eSIM status, and have your account details ready for the activation call. This is the quiet work that prevents delays when you reach out to support.
What to have ready before you start
A steady Wi‑Fi connection. A strong home network reduces one more potential hiccup during the activation call. If your Wi‑Fi pauses, pause the activation until you regain a solid signal. Your router’s name and password should be at hand so you can reconnect quickly. If you’re on a hotspot, keep a back‑up plan in case the signal drops during the setup. Reliable Wi‑Fi matters for a calm activation flow.
SIM status checked or eSIM prepared. If your device uses a physical SIM, locate the slot and confirm the card is oriented correctly. If your plan supports an eSIM, have the eSIM card or QR code ready and know where to find it in your device settings. This minimizes back‑and‑forth with support. Check the SIM status up front. What makes Lively Mobile a standout in mobile medical alerts in 2026
Your account details handy. The activation line will likely ask for the account PIN, the primary phone number, and service ZIP or address. Have a record of your Lively Mobile plan number, the last four digits of the account holder’s ID, and the billing contact email. This keeps the call moving and reduces the need to repeat information. Have account details ready for the activation call.
Quick prep checklist
- Verify Wi‑Fi name and password are within reach. Connect to a reliable Wi‑Fi network.
- Confirm SIM status or prepare an eSIM. Locate any QR codes if needed. Check SIM status or prepare an eSIM.
- Gather account credentials and plan identifiers. Have your account details handy.
From what I found in the activation guides, you’ll often be directed to start with the official channel for activation and then walk through the basics: connect, scan, and install the official Lively app. The core idea is to minimize friction during the live call. For context, Lively Activation emphasizes a straightforward path via the official tools and support line, with a focus on pre‑call readiness. Posture for activation reduces handoffs.
I cross‑referenced the official activation page and a quick guidance video to verify the core steps align with practical advice. The takeaway: having Wi‑Fi, a ready SIM/eSIM, and ready account details is the single most reliable way to keep the call crisp and on time. For readers weighing alternatives, rivals like Jitterbug emphasize similar pre‑call checks, but the official Lively routes stay closest to a one‑call finish when you’re prepared. The activation path you actually need.
If you’re worried about timing, plan for a 15‑ to 20‑minute window for the call and setup. On busy days, expect a brief hold or a short pause as the agent verifies your information. Keep a calm pace. There’s no rush to rush. You’ll walk away with a clear, simple activation flow.
Step 2: complete the activation flow with the official method
Activation takes a predictable path when you use the official route. You’ll start by reaching out to the Retail Activations team and then follow the guided prompts on screen. The goal is to land in a clean setup where you can sign in to the Lively app and confirm service is live. How Lively alert medical alert systems balance simplicity and safety in 2026
Call the Retail Activations team for a clean start
The easiest way to begin is a quick call to the Retail Activations line at 800-397-0588. This line is staffed to walk you through the next steps and catch any hiccups early. When you call, you’ll confirm basic details about your device and plan, then the agent will guide you through the on-screen prompts you’ll see once you power up. If you prefer hands-off setup, this call often shortens the back-and-forth with automated menus. Rely on the official line for the smoothest start.
During the call, expect to receive a simple action ladder: connect to Wi‑Fi, scan the QR code if prompted, and then allow the system to fetch your account credentials. It’s a small sequence, but sticking to it helps prevent common missteps like skipping the QR step or entering the wrong account information. Using the official activation line reduces setup friction. You can also confirm compatibility and ensure your SIM or eSIM is provisioned for Lively Mobile service as part of this conversation. Clarity from the Retail Activations team reduces calls back to support.
Follow on-screen prompts or the QR code guidance
After you initiate activation, the screen will present clear directives. If a QR code appears, point your camera at it to route the device into the activation flow. If you’re prompted to type in information, double-check spelling and the exact device serial number if requested. Follow the on-screen prompts precisely. One mistake, such as a mismatched plan or an incorrect email, can delay service. If you see a progress indicator stall, power the device off for a moment and restart the flow. Stability in the early steps matters. When the system requests permissions for device management or account linking, grant only the essential rights needed to complete activation. Keep permissions tight but sufficient.
In practice, these prompts align with the official guidance you’ll find via Lively Mobile’s setup channels. The prompts are designed to be user-friendly, especially for first-time setup, so you can stay focused on getting connected rather than debugging.
Download the Lively app, sign in, and confirm service
If the flow asks you to install the Lively app, do so from the official store. Open the app and sign in with the credentials you used during signup or as guided by the activation representative. Once signed in, you should see your device listed under My devices and a status banner confirming that service is active. Sign in to the Lively app to verify service. If the app prompts to set preferences or enable notifications, you can tailor these at your discretion, but skip nonessential extras if you want to finish quickly. Service verified in the app is the final proof of activation. What makes the hume health scale accurate in 2026
From what I found in the official pages, this entire flow, call the activation line, follow the guided prompts or scan the QR code, install and sign in to the Lively app, maps to the standard activation path. The call center line is the anchor, with on-screen prompts acting as the interactive map to completion. The official path minimizes surprises. For many households, this route is the most reliable route to a ready-to-use device.
If a snag arises, the common sticking points tend to be mis-entered account details or timing issues with SIM provisioning. In those moments, recontacting the Retail Activations line and reloading the flow often clears the issue without needing a second call to support. When issues pop up, a fresh start via the official line resolves most roadblocks.
Accessibility note: if you’re setting up for a caregiver, you can stay on the line with the agent while you perform each on-screen step, which helps keep a steady pace and reduces the chance of errors. In the end, you’ll have a working device with the Lively app ready to monitor usage, messages, and plan details.
Step 3: verify service and finalize setup
You’re nearly done. The goal here is to confirm your service is live, verify that basic messaging works, and link your account in the official app so everything stays in sync.
Confirm that cellular service is active in settings
Open your device settings and look for the cellular or mobile data menu. You should see a live carrier name and options to enable data, voicemail, and text messages. If you don’t see service, restart the device and recheck the SIM status. If it still won’t register, call the activation line at 800-397-0588 to confirm your account is active and the SIM is properly provisioned. In many cases, a quick toggle of airplane mode off and on helps the network handshake complete. Does LivFresh work in 2026? A practical look at gum health evidence and real‑world use
Most activation issues boil down to a lag between provisioning and the phone recognizing the SIM. If you’ve just activated, give it a few minutes and retry the network connection.
Test a voicemail or text message
Send a quick text to a friend or family member and listen for delivery confirmation. If you don’t see a receipt, verify that MMS/SMS settings are enabled in the messaging app and that the correct carrier plan is applied to your account. If voicemail isn’t picking up, dial your own number and listen for the greeting. If it rings but never records, confirm that voicemail is enabled on the account and that there’s adequate voicemail storage, then try again. These small checks catch the common misconfigurations that trip new users.
From what I found in the activation notes, you can also reach support at (800) 397-0588 or start at the official activation hub to re-provision the line if needed. This aligns with how Lively Mobile positions its support for hands-on troubleshooting.
Open the Lively app to complete account linking
Launch the Lively app and sign in or create your account if you haven’t yet. The app guides you through linking your device to your account so you get service alerts, billing, and plan management in one place. If you’re bridging a caregiver setup, the app also lets you grant limited access to another person to help manage the line. After linking, you should see the device status reflect as active and ready for use.
I cross-referenced the activation path and found the official hub emphasizes completing the account link inside the Lively app to finish setup. The moment you finish this step, you’ll have a synced profile across the device and the account, with voicemail and messaging ready to go. If you run into a stall, retry the login flow or reinstall the app to reset the binding. What Hume Health reviews reveal about the at‑home body composition landscape
When you’re done, take a moment to note the essentials: you’ve confirmed service in settings, validated a quick voicemail or text, and completed the account linkage in the Lively Mobile app. If you compare against rivals like GreatCall and Consumer Cellular, the streamlined in-app linking remains a standout convenience for non-techy users and caregivers who want a simple daily routine.
Open the Lively Mobile app to complete account linking and confirm that your voicemail and texts are flowing normally. This single step ties together provisioning, messaging, and billing.
Where this is going next for your Lively Mobile setup
A smoother activation hinges on a simple rhythm you can repeat. First, pick a quiet moment to start, then follow the on‑screen prompts with your Lively Mobile SIM in hand and your ID handy. I looked at the activation flow across several carriers and found that clarity and pace matter most. You’ll save time by keeping your device near your primary SIM card, your account details easy to fetch, and the charger nearby for any quick restarts. The one move that matters most is to confirm the network settings before you finish. This keeps you from redoing steps later.
If you’re switching from a rival like Verizon or AT&T, the initial kiosk or online activation can differ in speed, but the core steps stay the same: confirm your plan, verify your number, and test a call. With Lively Mobile, you gain calm, predictable prompts that guide you through without guesswork. Noticeably faster activation means less friction in your morning routine.
What changes if you act now? you’ll have a fully usable line with voicemail and data active, ready for everyday errands, video chats, and emergencies. If you want a quick reminder: set up a backup contact method and test a short call before you wrap. Think of this as a small daily win that keeps your day moving. What makes Lively Mobile life alerts safer and easier to use in 2026